
Dried Flower Pumpkins: Our Easy Mod Podge Pumpkin Craft (No Carving Required)
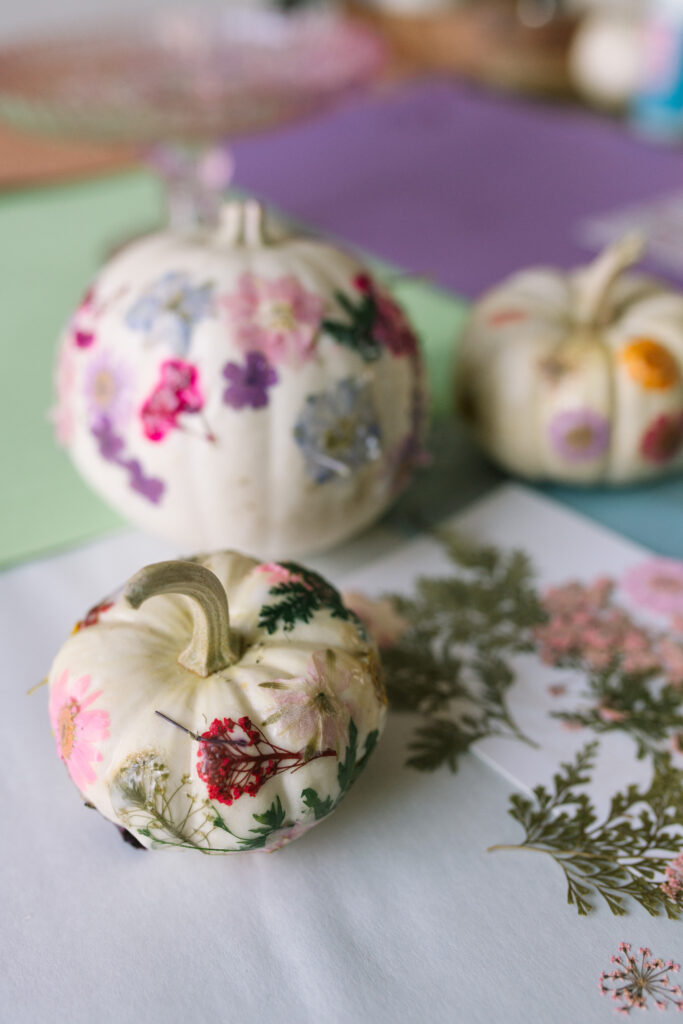
Dried flower pumpkins are the fall craft we look forward to every year. You take small white pumpkins, brush on Mod Podge, and press dried flowers and greenery all over them until they look like something from a boutique. This year I turned it into a little pumpkin decorating party for my 10 year old and a few of her friends, and the finished pumpkins have been sitting on our table looking pretty for weeks and weeks.
This post contains affiliate links, which means I may earn a small commission if you shop through them, at no extra cost to you.
We’ve painted pumpkins in past years, and this is so much less messy. There’s no paint to scrub out of anyone’s sleeves and nobody needs a carving knife, which is why it has worked so well for my tweens. They can do the whole thing on their own, and the result looks grown-up enough that I want it on my fall tablescape.
So here’s everything we use, where I’ve found the best price on dried flowers, and the one step I would never skip if you want your flower pumpkins to last.
What You Need to Make Dried Flower Pumpkins
The supply list is short, and you can grab most of it in one trip.
- Small white pumpkins. We buy ours at Trader Joe’s. White gives the flowers a clean background, and at this size one pack of dried flowers covers a pumpkin nicely.
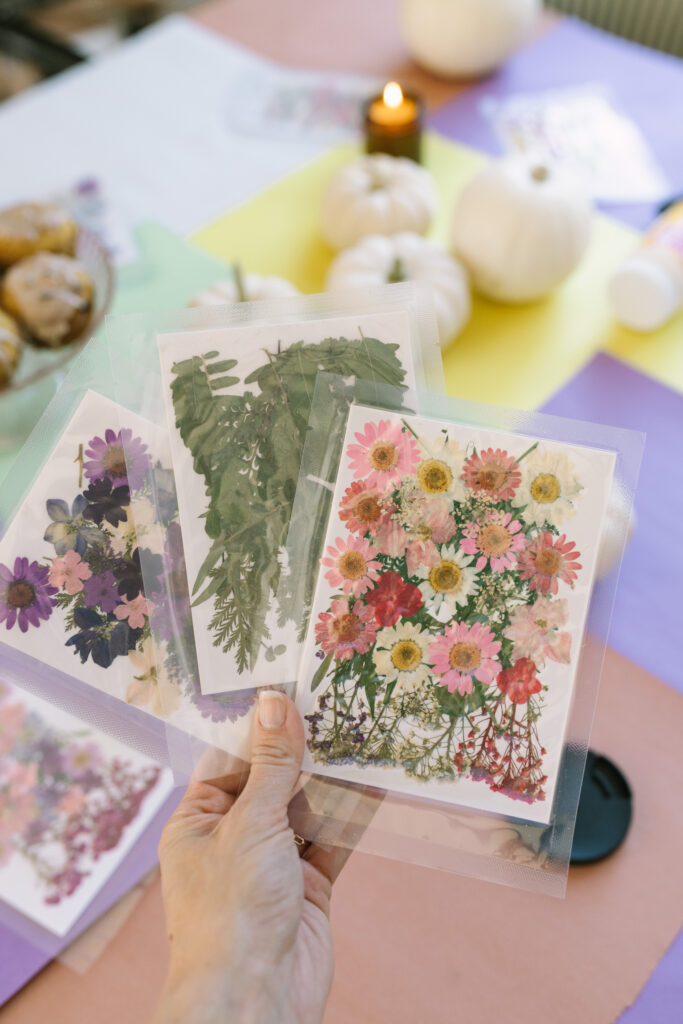
- Dried flowers and greenery. Look for packs with a mix of tiny flower heads and small leafy pieces. Where I buy them is right below.
- Mod Podge. The classic jar is all you need. 👉 Shop Mod Podge on Amazon
- Foam sponge brushes. One per person. 👉 Shop foam brushes on Amazon
- Something to cover the table. Craft paper is what I’d use if I had it, and newspaper works too. This year we covered the table in big sheets of construction paper (purely because that’s what we had on hand), and it did make the whole table bright and colorful.
- Helpful extras: paper plates to pour the Mod Podge onto, and small scissors for trimming stiff stems.
You’ll also see this craft called pressed flower pumpkins or decoupage pumpkins. Same idea: the flowers go down flat and the Mod Podge goes over the top.
Where to Buy Dried Flowers for Pumpkins
I used to order our dried flowers on Amazon, and it’s still the easiest place to grab a mixed pack quickly. 👉 Shop dried flowers for crafts on Amazon
This year I ordered from Temu, and it’s the best price I’ve found. The way Temu packages its dried flowers works out to pretty much one pack per pumpkin, and each pack has a mix of flowers and greenery, so you can hand every guest a pack and they have everything they need. If you’ve been on the fence about Temu, I shared exactly how my orders went in my honest Temu review.
Quality note: Once the flowers were sealed under Mod Podge, they looked lovely on the pumpkins. Real dried flowers are delicate and can crumble while you work, so if you’re crafting with little kids, faux dried flowers are a little more forgiving.
How to Mod Podge Dried Flowers on a Pumpkin
This is the method we’ve landed on after doing it every fall.
Step 1: Cover the table
Mod Podge drips and little flower bits end up everywhere, so cover the whole table before anyone sits down. Craft paper or newspaper is perfect.
Step 2: Wipe the pumpkins and let them dry
If you’re using real pumpkins, give each one a quick wipe with a damp paper towel and let it dry completely. Mod Podge grabs best on a clean, dry surface.
Step 3: Hand out a pumpkin and a pack
Give everyone a pumpkin and one pack of flowers. It helps to spread the flowers out first so you can see what you’re working with before the glue comes out.
Step 4: Brush on Mod Podge and press on the flowers
Dip a sponge brush in Mod Podge and brush a thin layer onto a small section of the pumpkin. Press a flower or a piece of greenery onto it, then brush a little more Mod Podge right over the top to hold it down. Work in small sections and keep going around the pumpkin.
Step 5: Let it dry, then do another round
Let the first layer dry before you go back in. I find a couple of rounds really helps. The second pass catches any edges that lifted and gives you a chance to fill in bare spots.
Step 6: Seal the whole pumpkin
Once you’re happy with the design, brush one full layer of Mod Podge over the entire pumpkin, flowers and all. This seals everything in, and it’s the step that kept ours looking good on the table for weeks. Set the pumpkins somewhere they won’t get bumped and let them dry.
Tips for Flower Pumpkins That Last
- Thin coats beat thick ones. A heavy glob of Mod Podge takes longer to dry and can pool around the flowers. Two thin rounds plus a seal coat looks cleaner.
- Don’t panic when it looks cloudy. Mod Podge goes on milky white and dries clear.
- Snip stiff greenery. Long pieces don’t want to curve around a round pumpkin, so cut them into smaller bits that lie flat.
- Keep them out of the weather. Ours live inside on the table. Rain and direct sun are hard on real pumpkins, and Mod Podge won’t stop a real pumpkin from eventually going soft.
- Give the finish time. Mod Podge feels dry fairly quickly, but Plaid (the company that makes it) says it takes about four weeks to fully cure, so go easy on stacking and handling for the first few days.
Is This a Good Pumpkin Craft for Kids?
It’s been great for my tweens. My 10 and 11 year olds can do the whole thing on their own, with no hot glue and no knives, and what they make looks pretty enough to earn a spot on the table.
Younger kids can join in too. A small pumpkin and a sponge brush are easy to manage, and a grown-up can help with the final seal coat.
If you have a girl this age on your Christmas list, my gifts for 10 year old girls guide has the top 10 my daughter picked herself.
How to Host a Pumpkin Decorating Party
This year’s party was simple, and that’s the beauty of it. Here’s how I’d set one up:
- Plan one pumpkin and one pack of flowers per guest. Temu’s packs make the math easy. I’d grab a spare or two in case someone wants to do a second pumpkin.
- Cover the whole table with craft paper, newspaper, or whatever big paper you have.
- Put out a sponge brush for each person, and pour Mod Podge onto a few paper plates down the middle of the table so everyone can reach.
- Give each pumpkin a landing spot. A paper plate with each guest’s name on it lets the pumpkins dry without getting mixed up, and it doubles as a tray to carry it home.
- Have a fall snack ready. If you want something homemade, my chocolate chip pumpkin bread is easy to make ahead.
Last year I hosted it as a girls’ night instead, so this works for a grown-up get-together just as well as a kids’ party.
Dried Flower Pumpkins on a Fall or Thanksgiving Tablescape
This is my favorite part. I love these on a tablescape, and since they hold up for weeks, they make pumpkin decorating for Thanksgiving easy. You don’t have to start your table over once Halloween is done.
Line them down the center of the table, set one at each place setting, or group a few on a cake stand. White pumpkins with soft dried florals say fall without saying Halloween, so they carry from October right through Thanksgiving dinner.
Conclusion: Will We Make Dried Flower Pumpkins Again Next Year?
Yes. This is a tradition at our house now. My tweens can do it start to finish, the flowers cost very little when I order them on Temu, and I get centerpieces I didn’t have to buy.
The one thing I’ll change next year is the table cover. Construction paper worked, but craft paper is what I’ll reach for.
If you’re tired of carving, grab a few of the little white pumpkins next time you’re at Trader Joe’s and give this a try. It might turn into your tradition, too. If you’re looking for more October ideas, here are our family Halloween traditions.
Dried Flower Pumpkins FAQ
Yes. We use real small white pumpkins from Trader Joe’s every year. Wipe the pumpkin clean and let it dry first, and keep it indoors once it’s done.
Ours have stayed pretty on our table for weeks and weeks. On a real pumpkin, the flowers last as long as the pumpkin does, because Mod Podge seals the flowers but won’t keep the pumpkin itself from eventually softening. On a faux craft pumpkin, they can last for years.
Brush a thin layer of Mod Podge onto the pumpkin, press the flower on, and brush more Mod Podge over the top. A couple of rounds plus one final full coat holds everything in place. If a piece won’t lie flat, trim it smaller.
Either works. Ours looked beautiful once they were sealed. Real dried flowers are more fragile, so faux ones are easier for kids to handle.
For a small pumpkin, one Temu pack was the right amount for us. A larger mixed bag from Amazon can usually be split between a few pumpkins.
Either one works. Matte gives a softer, more natural look, and gloss adds a bit of shine.
Yes. Craft pumpkins work the same way, and you can bring them back out next fall.